I've been wanting to make an indigo vat for ages, but just haven't gotten around to it. When my friend asked me if I wanted to join her for a weekend of indigo dying with Valerie Wells and Kelly Sheets at the Stitchin' Post in Sisters, I was all in.


Val and Kelly had many samples of indigo shibori (Japanese manual resist dying technique, which produces patterns on fabric) and explained how they achieved the results for each of them, including folding, tying, clamping, stitching, using rubber bands, rocks, glass globs, slinkies, rope, chopsticks, cords, cardboard, plastic shapes......the sky is the limit!! I had a handful of flour sack towels plus other fabrics to try my hand and experiment with all these great ideas.

This piece was using the "ghost" technique. You grab the piece by the center, and use a string to tie it up into a bundle. I'll use these pieces made from drop cloth to make some more square corner bags like this one:

Here's a bundle with chopsticks rolled up and tied.

Perhaps it created something like the piece hanging on the far right:

This next piece reminds me of fish scales. It was rolled onto a rope, then you tie the rope, causing the sides to squish into each other, kind of like a scrunchy hair band.

These are glass globs tied with rubber bands.

They create the "circles". The lines are achieved by stitching a simple running stitch.

I think it may be my favorite piece. I watched some youtube videos about shibori stitching. I like how you can use the stitches to "draw" something specific on the fabric. There is a lot of control over details.
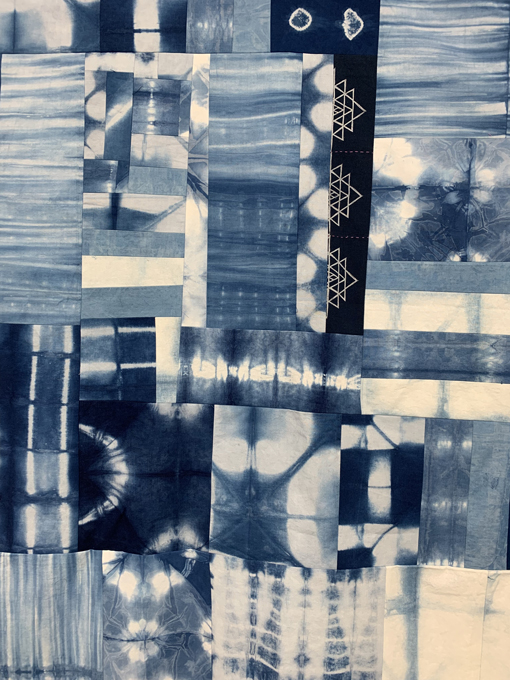
This is a quilt top Valerie brought in to show us as another idea of what we might do with all of our samples.
We talked about different types of indigo, with tips on how to successfully set up our own vats if we choose.

I was able to dye a couple yards of organic cotton jersey fabric and some pieces of clothing as well. I had stitched this top a few years ago. I loved the Burgundy and gold combination.....on someone else. I did not like the color combination on me, and so I hardly ever wore it. It was a little scary dipping it into the vat, not knowing if I would like the results. But hey, I hardly wore it, so it was worth the risk. Here is the original top.

Here is the first dip. Not too bad, but a little muddy for me.

And the last dip....

Soooooo much better! Don't you agree? It was darker before I washed it. I don't think I had the water hot enough to set it properly. If I do my own vat one day, who knows, I may dip it again, but for now, I love the results and I know I'll get a ton of wear out of this top now.
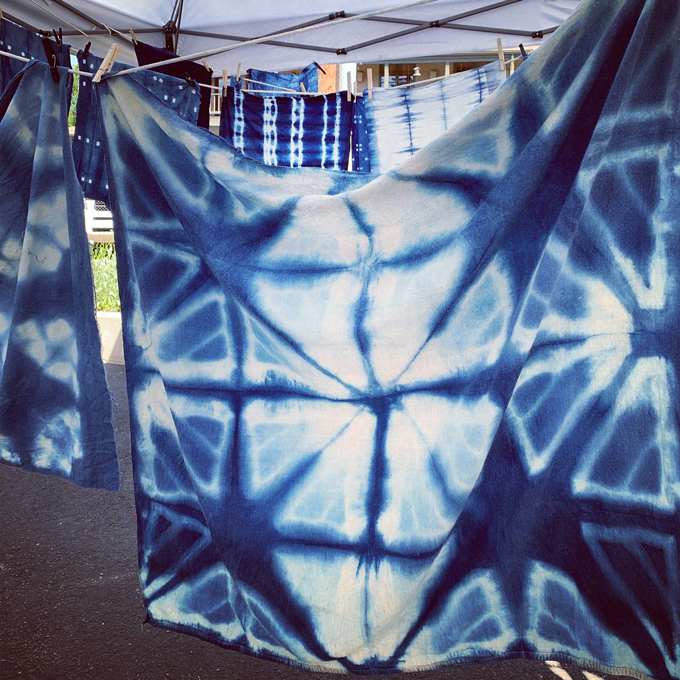
It was a gorgeous, sunny day. Seeing all these beautiful indigo pieces, gently swaying in the breeze created a most impressive vision. Creating together is very inspiring. Community artwork, for sure.


Beautiful. I have fabric all tied and ready to go for Indigo dyeing. Just need to get down in the basement to dye them. Think tomorrow is the day i try to do it. Thanks for the article.
ReplyDeleteHow exciting! How many pieces are you doing? Do you know what you'll make with them? I hope you love all your results!
Delete