"THE" Coat ~
April of 2013 was my first trip to Alabama. For Christmas, my sweet husband had surprised me with my dream gift, an Alabama Chanin weekend workshop. And because I was going through the time and expense of flying from Oregon to Alabama, he decided to throw in the Private Studio Day to boot. I was so surprised and overwhelmed that tears began streaming down my face. My kids were concerned, "What's wrong with mom?" I could hardly speak. The only words I could choke out in a crackling, halted voice were, "I'm going to Alabama!" Their look was priceless. It was the "Mom's up and done it; she's gone bananas; and we're going to have to cart her off to the funny farm" look.
That trip fueled the flames and started me on my path to prolifically sewing my Alabama Chanin collection, becoming an Alabama Chanin certified sewing instructor, and teaching classes to other hand stitching enthusiasts. What a wonderful and thrilling adventure it has all been! But I digress....
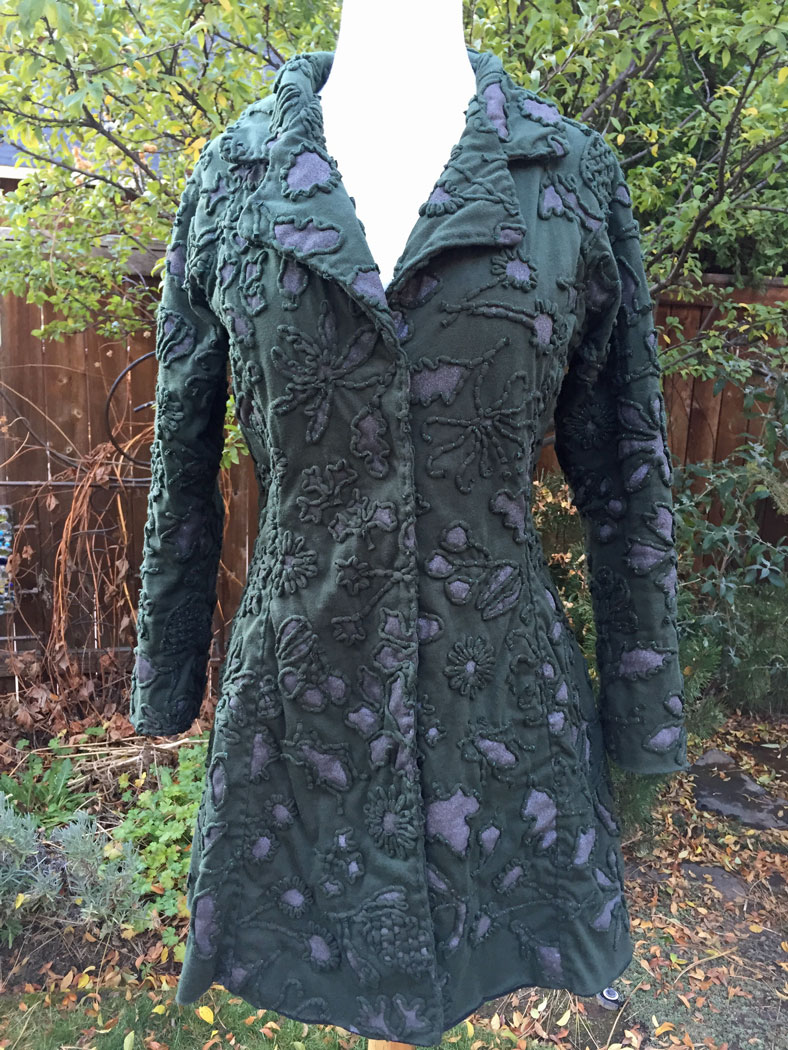
During that first trip to the Factory, I chose nine projects, ranging in difficulty from a simple hat to the Grand Poo-bah, piece de la resistance, a 3/4 length, fully couched, dolmain coat, lovingly referred to as "THE" coat. I knew I wouldn't begin this project until after all the others were finished. I knew I may have chosen a, shall we say, ambitious project for a relative newbie. I knew it would take me quite awhile before I would actually wear "THE" coat. Little did I know then just how lengthy that while would be. When I finally did get my first panel out for "THE" coat, never having couched a single item in my life, I was naively surprised at just how incredibly time intensive the process of couching was.

The Alabama Studio Sewing & Design book provides full, detailed directions for this beautiful technique. Basically, it's using some type of thread or cording (I used strips of jersey stretched into "pulls") and stitching it down to create a design. I found that once I got the hang of it, it took more patience and tenacity than skill.
It was almost two years ago when I first began stitching the coat, and about two and a half years since the coat was cut. Over the years I would complete a panel here, then set the project aside for a few months, and sew another panel there.

This summer I was able to finish up the final panel, and last week, I dug out my moleskin journal with chicken scratch, hastily scrawled notes that I took from Diane, and with some diligent deciphering along the way, finally constructed this beloved garment. Diane was a wonderful tutor, as the coat went together seamlessly (pun intended) in one short week.
The final flourish was the crocheted snaps.


I mistakenly used the button craft thread to crochet a set of snaps once. Don't do it! That thread is too thick to get a firm connected snap. The suggested two strands of floss works perfectly.You can find complete directions here in an entry in the Alabama Chanin Journal.
There was the tiny drum roll of my heart as I put it on for the first time. Would it fit? Had I stitched for near two years to end up with something I couldn't wear? I have to say I was greatly relieved and happily surprised with just how well "THE" coat fit. Again, Alabama Chanin pulled through with another beautifully designed garment. I wouldn't change a single detail.

I had initially intended to couch and reverse applique all the elements of the coat. That would mean cutting off the top layer of paint to reveal the black layer of fabric beneath. After completing my first piece, I felt there was enough going on with the pattern already, and that the added color variations would become too busy. Although snipping the pieces for the reverse applique is one of my favorite processes, I decided to forgo it in lieu of a more subtle look.

Here's a detailed shot. Do you see the beetle bug? That's one of my favorite parts of this stencil, Job's Flowers.

Here's the reverse side of the sleeve.

I'm very glad I stuck with this project. Though time consuming, the results of the couching method are stunning and timeless. "THE" coat is complete and ready to wear, just in time for Autumn~ Perfect!


